All photos from the NYTimes.
Thursday, October 28, 2010
INTERIORS: Love and Lusting in Paris
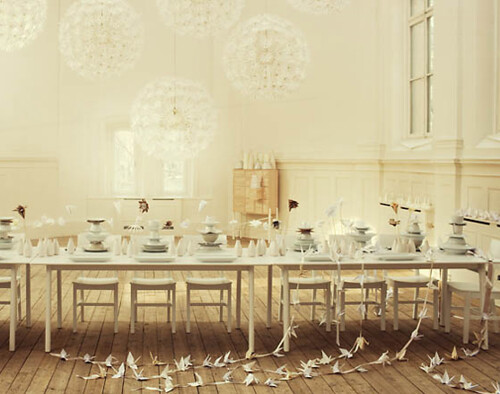
I'm pretty much in love with this bare bones approach to a beautiful 1800s property in Paris. The curves, natural color palate of warm beige and white, reminds me of my childhood in Vietnam and how close we lived to nature. My plate has been heaping full, with unexpected emergencies amidst busy non-profit fundraising and political campaigning season, the past few weeks, and there's nothing that sounds better than curling into a space like and read my resh new copy of Robert Frost:
Tuesday, September 28, 2010
BOOKS: Laurie Colwin
I love me a good book. Even better, I love a good book with good food descriptions in it. Something about the description of what characters are eating, makes me feel like I know them and then can truly be friends with them. I think of it as breaking bread with the story and really getting to know the ins and outs of the lives of the people that I will be spending hundreds of reading pages with. Would Harry Potter, Hermione Granger, and Ron Weasley truly be properly wizardish and British without treacle tart, butterbeer, or Bertie Bott's every flavor beans? I don't think so. I was wending my way through a Half-Price Books this weekend and happened upon this book:

And in doing so, I found a kindred spirit. I am not a stranger to Laurie Colwin's writing. The first time I read a column by Mrs. Colwin was in an old issue of Gourmet magazine. I was struck then by her writing style: honest, witty, warm, and friendly. However, reading her collection of essays truly made me feel as if I were in her kitchen, gabbing about the merits of mushrooms, biscuits, and of course, books. In her book, Mrs. Colwin too, writes about her love of cookbooks and novels with fantastic cookery. And here I thought I was the only one who could gain 5 lbs from reading a book. Finding Mrs. Colwin's book made my weekend, as I curled up in a couch, hot chai in hand, and savored her words. Sadly, Mrs. Colwin died unexpectedly from a heart attack at the too-early age of 48 in 1992. I imagine that she is still much missed, though it has been nearly 20 years since her death. But I am glad that the author was able to share so much in her short time, making friends and breaking bread with all of the foodies out there, for generations to come.
Recipes of what I ate while enjoying Laurie Colwin's words:
I got this recipe by way of 3191 (thank you Stephanie!):
Stand-by Family Granola inspired by/adapted from Crunchy Granola in How to Cook Everything & 3191
6 cups rolled oats
2 cups mixed nuts and seeds (I only had nuts on hand, so it was a combination of hazelnuts and pine nuts)
1 cup unsweetened shredded coconut
1 teaspoon cinnamon
1/4 cup brown sugar
3/4 cup creamy honey
Dash Kosher salt
Preheat oven to 325 degrees. Place a baking pan (at least 9 x13) over medium heat on the stove top. Add the oats and toast, stirring for a few minutes. Add the coconut, nuts and seeds and spices and continue to toast for a few minutes more until everything begins to brown and become fragrant. Warm the brown sugar and honey in a small saucepan until the sugar dissolves. Pour over oats mixture and stir to thoroughly combine. Sprinkle with salt. Bake for approximately 20 minutes (it depends on the size of the granola batch and the size of the pan). Check every 5-10 minutes or so and give it a good stir. Allow to cool and store in an air-tight jar.
Chai (from chai concentrate recipe found here)

And in doing so, I found a kindred spirit. I am not a stranger to Laurie Colwin's writing. The first time I read a column by Mrs. Colwin was in an old issue of Gourmet magazine. I was struck then by her writing style: honest, witty, warm, and friendly. However, reading her collection of essays truly made me feel as if I were in her kitchen, gabbing about the merits of mushrooms, biscuits, and of course, books. In her book, Mrs. Colwin too, writes about her love of cookbooks and novels with fantastic cookery. And here I thought I was the only one who could gain 5 lbs from reading a book. Finding Mrs. Colwin's book made my weekend, as I curled up in a couch, hot chai in hand, and savored her words. Sadly, Mrs. Colwin died unexpectedly from a heart attack at the too-early age of 48 in 1992. I imagine that she is still much missed, though it has been nearly 20 years since her death. But I am glad that the author was able to share so much in her short time, making friends and breaking bread with all of the foodies out there, for generations to come.
Recipes of what I ate while enjoying Laurie Colwin's words:
I got this recipe by way of 3191 (thank you Stephanie!):
Stand-by Family Granola inspired by/adapted from Crunchy Granola in How to Cook Everything & 3191
6 cups rolled oats
2 cups mixed nuts and seeds (I only had nuts on hand, so it was a combination of hazelnuts and pine nuts)
1 cup unsweetened shredded coconut
1 teaspoon cinnamon
1/4 cup brown sugar
3/4 cup creamy honey
Dash Kosher salt
Preheat oven to 325 degrees. Place a baking pan (at least 9 x13) over medium heat on the stove top. Add the oats and toast, stirring for a few minutes. Add the coconut, nuts and seeds and spices and continue to toast for a few minutes more until everything begins to brown and become fragrant. Warm the brown sugar and honey in a small saucepan until the sugar dissolves. Pour over oats mixture and stir to thoroughly combine. Sprinkle with salt. Bake for approximately 20 minutes (it depends on the size of the granola batch and the size of the pan). Check every 5-10 minutes or so and give it a good stir. Allow to cool and store in an air-tight jar.
Chai (from chai concentrate recipe found here)
1 14-ounce can sweetened condensed milk
1 teaspoon granulated sugar
1 teaspoon ground cardamom
1/2 teaspoon ground cinnamon
1/2 teaspoon ground cloves
1/2 teaspoon ground nutmeg
1 teaspoon granulated sugar
1 teaspoon ground cardamom
1/2 teaspoon ground cinnamon
1/2 teaspoon ground cloves
1/2 teaspoon ground nutmeg
Empty condensed milk into a jar or plastic container with tight-fitting lid. Stir in the sugar, cardamom, cinnamon, cloves and nutmeg. Store in refrigerator.
To use: Brew a cup of strong black tea, such as Assam, then add two heaping teaspoons of concentrate or more to taste. Stir well until concentrate has fully melted.
To give: Pour into small jars with lids and tie with an attractive bow, or wrap the jar first. Attach a tag with instructions to keep the mix refrigerated and how to use it.
To keep: Store in refrigerator for up to 6 months.
Take care and break bread friends!
--J
Monday, September 13, 2010
WEDDING: Project Centerpiece
Hey all!
Sorry it's been awhile, August kind of just flew by, and before I knew it Autumn and September arrived on my doorstep. But what a fun month August was! My friend Dao got married, and I got to learn how to do many things: decorate cans as vases, make flower centerpieces, bake her wedding cake (with accompanying cupcakes), etc. It was such a joyful day! One project that I really enjoyed was decorating aluminum cans as vases. The cans are great because they are: 1) Pretty! 2) Environmentally friendly, and 3) Really, really, easy.

All you need are: old cans (big soup cans work well), cardstock paper, modge podge (or some sort of sealant), scissors, brush, and vintage labels. Here's the how-to:
1. Clean and dry outside of cans.
2. Cut and measure cardstock paper to the proportions of the can. It does not have to be exact measurements. In my case, using a 12" x 12" piece of paper, I eyeballed the approximate height of the can (about 8") and then chopped off 4 inches of paper. Now, a 12" x 8" piece of paper was not enough to make it around the particular can I was using, so I cut the 12" x 4" piece of paper I had leftover to cover the space. Because a vintage label is going to be going over this layer of cardstock, the end results from this step does not have to be neat.
3. Slather on a layer of modgepodge on the can.
4. Press cardstock onto can. Then modge podge this piece of paper. Continue doing this until your can is covered with cardstock and modgepodge.
5. Allow to dry for 4 hours, or for best results, overnight.
6. Slather modgepodge over the area you want you label to be.
7. Press label onto modgepodge.
8. Paint yet another round of modgepodge over your label.
9. Let dry for at least 4 hours.
I found my vintage labels here and here from i-DiY, which stand for i-do-it-yourself weddings. Great site for very pretty labels and other goodies! Here is a preview of some the labels available:
Okay all, take care, and catch you all again soon!
--J
Sorry it's been awhile, August kind of just flew by, and before I knew it Autumn and September arrived on my doorstep. But what a fun month August was! My friend Dao got married, and I got to learn how to do many things: decorate cans as vases, make flower centerpieces, bake her wedding cake (with accompanying cupcakes), etc. It was such a joyful day! One project that I really enjoyed was decorating aluminum cans as vases. The cans are great because they are: 1) Pretty! 2) Environmentally friendly, and 3) Really, really, easy.

All you need are: old cans (big soup cans work well), cardstock paper, modge podge (or some sort of sealant), scissors, brush, and vintage labels. Here's the how-to:
1. Clean and dry outside of cans.
2. Cut and measure cardstock paper to the proportions of the can. It does not have to be exact measurements. In my case, using a 12" x 12" piece of paper, I eyeballed the approximate height of the can (about 8") and then chopped off 4 inches of paper. Now, a 12" x 8" piece of paper was not enough to make it around the particular can I was using, so I cut the 12" x 4" piece of paper I had leftover to cover the space. Because a vintage label is going to be going over this layer of cardstock, the end results from this step does not have to be neat.
3. Slather on a layer of modgepodge on the can.
4. Press cardstock onto can. Then modge podge this piece of paper. Continue doing this until your can is covered with cardstock and modgepodge.
5. Allow to dry for 4 hours, or for best results, overnight.
6. Slather modgepodge over the area you want you label to be.
7. Press label onto modgepodge.
8. Paint yet another round of modgepodge over your label.
9. Let dry for at least 4 hours.
I found my vintage labels here and here from i-DiY, which stand for i-do-it-yourself weddings. Great site for very pretty labels and other goodies! Here is a preview of some the labels available:
Okay all, take care, and catch you all again soon!--J
Wednesday, August 25, 2010
DESIGN: Cavallini & Co
I received a delightful Eiffel Tower Thank You card today made by Callini & Co and I'm absolutely in LOVE with their products.
I might even covet one of these beautiful weekly planners to get a head start on 2011. All their products are so whimsical and fun, and made with impeccable taste and quality. The thank-you card I received was printed in Italy!
My fave has to be the wrapping paper made from a printed map of Parisian monuments below. The vintage inks, coming from someone who works on maps and urban planning documents all day, these are absolutely heavenly and makes me want to revert to old school design. Hope you find these as delightful as I do!
ARTS: Moleskin Sketchers
Have you seen Moleskin's online gallery of sketches? Submitted by Moleskin lovers, there is everything from pencil sketches to complete water colors, and are absolutely stunning. I'll let them speak for themselves below, enjoy!
Monday, August 2, 2010
SUMMER: City Love
It's been awhile since I've been out taking pictures. Call it a funk. Or a bad day. That actually lasted three months. Sigh. Lots of work and studying and life can really take a toll on oneself. But, I think, after this weekend, that maybe I can say that I am starting to reclaim my mojo? I hope. Well, at least it's a start. And I can't think of a better way of getting out my uninspirational funk than by taking pictures and sharing it with you all. =) Best of all, I took pictures in one of my favorite places, Pike Place! I hope you all enjoy!
I can never get enough of Pike Place Market. Love it, love it, love it. My very first photo adventure took place here as well. So, some very good memories brought me back for another go.
Fresh veggies. Makes me think of Deborah Madison's book Local Flavors. Time to get started cooking! I'm excited.
Fresh lilies. They are so pretty, that I think I will have to incorporate these into my friend's wedding (see Tams's previous post). Won't these look nice in a bouquet with some gerbera daisies, rosemary, and sage?
The sight of these striped umbrellas and flowers in window boxes really make me happy.
I ate a big bowl of salad for dinner after taking pictures. Pretty sure this is the reason why...
Fresh juice bar. Yum! Sadly, as it was the morning when I came down to take pictures, I opted for a caffeinated drink.
My friend Monica checks out miniature cheesecakes. They had some delicious sounding flavors! It's a must-try one of these days.
Been a sucker for interesting labels and signs lately. Like the vintage tone of this one, not to mention the contents of the shop itself.
Olive oil, such an essential cooking item. The display and layout of this shop are so pretty too.
Dried fruit stand is practically mandatory every time I go to the market.
Label says it all. Dried strawberries and dried sour cherries are my favorite!
Enjoy all!
--J
Enjoy all!
--J
Friday, July 23, 2010
Summer: Wedding Fever!
It would be fair to say Jean and I are officially having wedding fever. One of our very best friends is getting married in three weeks and we're all feverishly preparing for one of the happiest days of our friend's life. I'm in charge of wedding planning, and Jean is in charge of the cake and creative direction. We are also collectively managing the decors. Jean and I cannot stop swooning over beautiful wedding inspirations from books, magazines, and yes, blogs.
Our friend's theme is white and yellow, it's a small and intimate wedding, with lots of loving touches from friends and family.
{Photo: Sweet as Candy}Jean and I have been inspired by the use of fresh herbs like lavender and rosemary for the table centerpieces, keeps it organic, not too pretentious and also a great take away for guests.
How pretty are these light pink chiffon flowers? Jean and I are pretty sure we can incorporate these in there some how, they're just so delicate and feminine, after all, isn't a wedding about celebrating beauty and love?
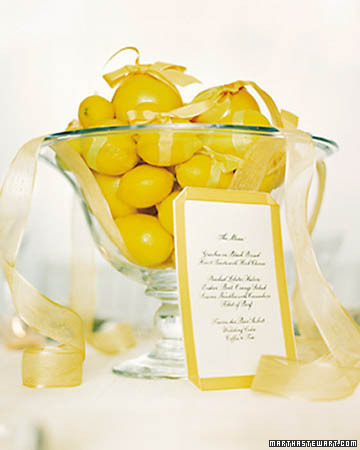
We also adored the idea of a citrus in glass centerpiece, the imagery makes me think of summer, happiness, and the freshness of the couple's new chapter together.
How adorable is this? A yellow ribbon and a white paper bag can brighten up a whole wedding.
Jean is a great collector of beautiful containers, we were thinking of using them as impromptu vases with a wonderful bit of personality and character.
Our bride is a chef, the checkered napkins reminds us to mentally prepare ourselves for the feast to come, and the casual potted plants invite ease and comfort, to fill ourselves up with scrumptiousness and the love going into our bellies, and focus on why we're really here: to celebrate love.
We are so happy to be a part of the wedding planning, and will be thrilled to post the wedding photos as soon as we get them next month! Congratulations Steve & Dao! We love you and cannot wait to see you share the rest of your lives together.
Friday, July 9, 2010
Subscribe to:
Posts (Atom)